Friday 26 February 2016

How to get the perfect BRIGHT RED hair at home

If you're like me and you don't like going to a beauty parlor, you'll find this helpful.
I do recommend going to a salon for best results but I can't really recommend one, you have to trust google reviews for that.

Since I get so many questions on this topic I decided to finally make a blog post to guide you to the perfect bright red hair step - by - step


What you'll need : hair bleach, semi permanent hair dye, hair mask, and a good conditioner. Also someone to do your hair if you are unable to do it yourself (my best friend Bibi helps me)

Step 1 : Evaluate your canvas

First of all carefully consider the type of hair you have : length? thickness? damage level? previous color?
Keep in mind that bleaching your hair results in irreversible damage so if you don't feel you should do it, you'd better wait until you get the hair into shape
Also, the length and thickness of your hair will determine the amount of products you need to use

Step 2 : Prep

Get the aforementioned bleach and dye, also some clothes and towels you won't miss, some bowl to mix your stuff in, a brush and a friend or more to help (if needed)

Step 3 : Bleaching the shit out of your hair

You can use any bleach you like, I usually go either for Syoss or Kallos :

Syoss is a bit more expensive but I find it's a bit *less* damaging on the hair

Use 20%, 30% or 40% vol depending on your hair type. I used 40% on previously bleached hair and I'm not bald yet but I don't recommend trying this at home.
Apply on the hair and wait 20 -30 mins. If your hair is dark and needs to be bleached twice, wait two weeks between bleaches.
If you are doing both the bleaching and coloring in one night, thoroughly wash out the bleach and wait a bit to dry out, but don't get it completely dry and DON'T USE A BLOW DRYER at this point.

Step 4 : Coloring

I like to use semi permanent  hair color because I don't mind reapplying it often and it's less damaging to the hair
My favorite red dyes are Directions Fire and Loncolor Trendy Colors. The latter is also very cheap so I used it last time.

Again, depending on the length of your hair, you'll need between 1 and a shitload of tubs / packets.
I use a shitload because of reasons.
You will also be needing a hair mask, anything for damaged hair is fine, if you wanna go the extra mile to care for your hair use Age Recharge from Kerastase. I usually use Elseve. It's more budget friendly


In a bowl mix your dye with the hair mask in a 4 : 1 ratio. Apply it to the damp hair and let it soak for 30 to 40 minutes. Rinse with lukewarm or cold water. It must be as cold as you can take. Lucky me, I actually love cold water on the head because it cools my overheated brain
Aaaaand you're done. Dry it with a towel, hair dryer or just bang your head.
I use a combination of towel and headbanging because I never blow my hair. It's better for it!
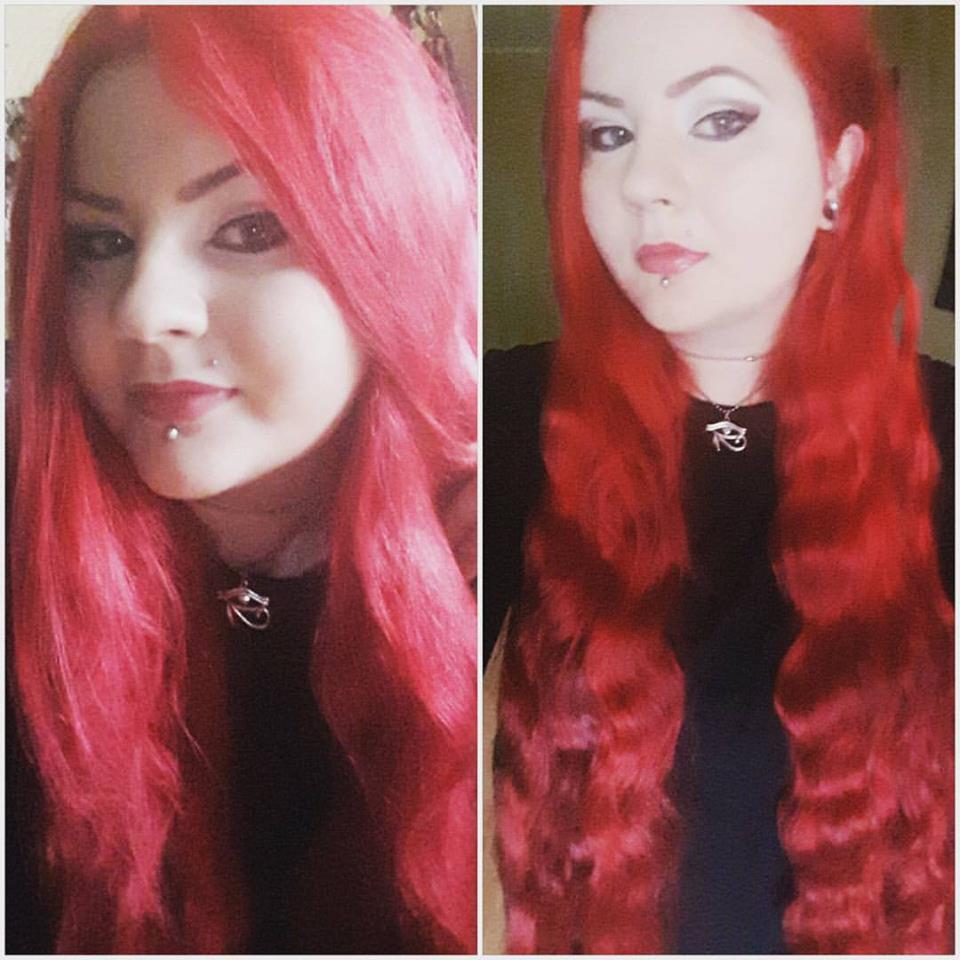
How to go from a dull head of hair to a fab fiery mane in easy steps. Plastic foil on the hair is not mandatory.

Step 5 : taking care of your hair

Okay so by now I gave you budget friendly options but when it comes to long term hair care you don't want to cut on the conditioner. My personal fave is Bed Head Urban Antidotes 3. It's worth every penny. Use it after every wash, and don't forget that the color will wash out in time. I will give you some tips below to make the color last longer and your hair be smoother.


TIPS:

*  don't use a blow dryer
* don't use hot water when washing your hair, I recommend the water be as close to cold as it is comfortable for you
* don't wash your hair TOO often, once a week is really enough
* use a tangle teezer if you have tangly hair, it saved me a lot of hair cuts.


Now your hair should be as bright and as pretty as ever!


DO YOU HAVE ANY QUESTIONS?
I will answer as swiftly as I can!

Lots of love, XOXO
Zenith

Tuesday 6 October 2015

New rings

Două modele noi de inele disponibile.
20 de lei

Monday 31 August 2015

From Carrion to Chokers

I most often am asked about my items made with real animal components, so I've decided to answer all those questions here and to top that off with some lovely photos. Hope you enjoy.


Where it all starts.


Ever since I can remember I had a fascination with Death, and I've never really seen it in itself as something grim, but rather pictured it as a natural step in what we call a life cycle.
Many beautiful and poetic ideas may stem from here, but what I like most is that it is a reminder of how frail and similar we all are.
I don't remember where I read that "Death is equal to all, that's what makes it so frightening", but it stuck with me as a pleasant reminder that we are all equal as human beings. Possesions, titles, power, personal ambitions and even hopes and dreams all fade in comparison to Death's sheer scale , universality & perfection. Another of my favourite quotes is "Death is a good fellow and keeps open house." Go figure.

Another wonderful thing I find is linked to Death is that it is also a reminder that Life is precious. Make the best out of it, live it how you find fit, do what makes you happy and try to be nice with everybody. Or at least don't harm anybody. But I guess this is the same feeling you get from Memento Mori artworks , right?

Having this in mind, I have always been an inquisitive kid. Curiosity sometimes killed the cat, but it also sometimes brought the cat close to dead things. And since I have been making accessories as a way of relaxing and spreading the love of things DARK, I've decided to include all stated above in that.

Raw material


I always use animals which have died of natural causes, carrion found in forests, fields and parks. Yes, I'm that freak in your local park that is happy when seeing animal corpses and takes them home with her.
They usually looke like this, sometimes fresher, sometimes more disgusting. But I'm not one to be disgusted easily, so I collect my materials and proceed to work on them. I use two main techniques now:

- mummifying (for the claws and tallons)
- boiling (for cleaning bones)


Boiling is a difficult procedure at times, especially since you can imagine my kitchen does not smell of roses during this operation. But hey, it's one of those rare moments when I cook so I still get wife material bonus points, right?


Duration

It takes a lot of time (and a lot of work) to complete a single piece. Between gathering the raw materials, preparing it, working on it and finishing it up, it can take even up to three months per piece.
I also use varnishes, cleaning solutions and paints to make them pretty.
Besides work, I put a lot of love in my creations, so the final item is a unique combination of the beauty and death and the love of life.


WHY? OH GOD, WHY?

Another interesting question is of course " why? "
It's quite often that I get that "shuddering in disgust" look .
I'm not too much of a fan of finding explanation for everything, but to put it short, I love it. I love  that new life can be put in lifeless remains. I like to show others that death and decay are not only natural, but they can lead to beauty.


Do you have something you would like to ask me or do you want to comission stuff from me?
Leave a comment below :)

Tuesday 25 August 2015

Make up Revolution Lipstick review

So after reading a lot of reviews I've decided to take a chance and order some Make up Revolution lipsticks online ( you can find them anywhere, from okazii to ebay), and I swatched them out. The colors are pretty, the lipsticks are very affordable, but you get what you pay for. They have a gluey texture, they don't last long and they smell funny. But the colors are so lovely. Too bad. 

Colors swatched : Atomic Serpent (top left) , Depraved (bottom left) , Make it right (bottom right)


Overall, I think these lipsticks would be fab for a photo shoot, a fancy dress party or anywhere if you are willing to reapply often.


Thursday 30 July 2015

Memento Mori

Is all that we see or seem but a dream within a dream?